


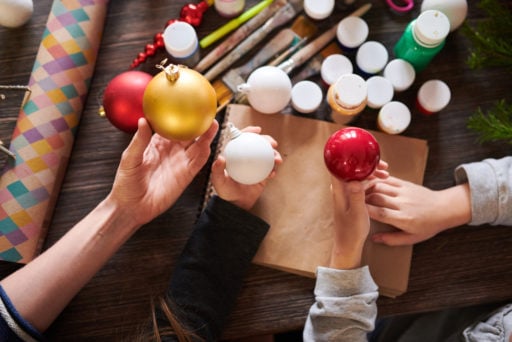
Whether you're looking for a fun activity to do with the kids or want to add some unique charm to your Christmas tree decorations, there are so many fun and festive DIY bauble craft ideas you can choose from.
Crafting your own Christmas baubles allows you to infuse your personal style and creativity into your holiday decor. With a wide range of materials, techniques, and themes to explore, you can tailor your DIY baubles to suit your preferences and match your overall aesthetic.
So, without further ado, here is our list of DIY bauble craft ideas:
Glitter and sequin baubles
If you want to add some glitz and glamour to your decorations this year, use glitter and sequins to make your baubles twinkle like stars.
Materials you'll need:
- Craft glue
- Glitter
- Sequins or small decorative gems
- Ribbon or string for hanging
- Optional: Paintbrush or foam brush for applying glue and gems
How to make glitter and sequin baubles yourself
1. Get your bauble
Apply a layer of glue around your clear or frosted baubles in various shapes and patterns.
2. Sprinkle glitter onto the glue
Cover the entire surface so every glued area has plenty of glitter on it. Get creative and have fun with your designs. You can experiment with different coloured glitter and baubles as well as create fun patterns like stripes or dots.
3. Shake off excess glitter
Once you’ve removed all the excess glitter, let your bauble dry.
The result will be beautiful baubles that shimmer and shine, bringing a festive and joyful ambience to your Christmas decor.
Painted baubles
Painting your baubles can offer so many creative possibilities. You can create unique designs, patterns, and even miniature scenes on baubles using various colours of acrylic paint.
Materials you'll need:
- Acrylic paints in various colours
- Paintbrushes in different sizes
- A palette for mixing paint
- Water and paper towels for cleaning brushes
- Optional: Pencil for sketching designs
How to paint your baubles
1. Get your bauble
If you have a specific design in mind, lightly sketch it on the bauble using a pencil. This step is optional, and you can also paint freehand without any preliminary markings.
2. Gather all your paints and start brushing
Dip your paintbrush into the desired colour of acrylic paint and start painting your design onto the bauble. You can use thin or thick brushes depending on the level of detail you want to achieve. Experiment with different brushstrokes and techniques to add texture and visual interest to your baubles. You can create swirls, dots, lines, or even blend colours together for a gradient effect. If you're curious about what Christmas colour schemes work best, be sure to check out our other guide for more advice!
If you're struggling for inspiration, you can also create patterns and abstract designs associated with Christmas, like snowflakes, trees, Santa and reindeer. Maybe your Christmas decor has a particular theme like fantasy or Candyland; you could paint images and patterns that reflect your chosen aesthetic.
3. Let your bauble dry
Allow each colour to dry before applying another layer or switching to a different colour. Acrylic paints typically dry quickly, but it's best to let each layer dry thoroughly to prevent smudging or smearing.
Once dry, you can add details or accents using metallic or glitter paints. These can be applied with a smaller brush to create highlights or add shimmer to your design. Whether you prefer intricate or bold designs, painted baubles will add a touch of artistic flair to your holiday decor.
Have fun experimenting with colours, techniques, and themes to create a stunning collection of hand-painted baubles that will make your Christmas tree truly magical.
For more inspiring paint-your-own bauble ideas, why not check out our full guide?
Decoupage baubles
Decoupage baubles are a delightful way to incorporate decorative paper or tissue onto Christmas baubles, resulting in beautifully embellished ornaments. This technique allows you to create various designs, from elegant and vintage to whimsical and colourful.
Materials you'll need:
- Decorative paper or tissue paper
- Scissors or a craft knife
- Glue
- Paintbrush
- Small bowl or palette for glue
- Ribbon or string for hanging
- Optional: Acrylic paint for base coating
How to decoupage your baubles
1. Prepare your bauble
Start by preparing your baubles. If desired, you can paint the baubles with a base coat of acrylic paint to enhance the colours and provide a consistent background for the decoupage.
2. Let the base coat dry
Before proceeding, allow the base coat to dry completely so you can add to your bauble seamlessly.
3. Cut or tear small pieces of your paper
Using a paintbrush, apply a thin layer of glue to a small section of the bauble. Work on one section at a time to prevent the glue from drying too quickly.
4. Place a piece of the paper onto the glue-coated section
Gently press it down with your fingers or a clean brush to remove any air bubbles or wrinkles. You can slightly overlap the pieces to create a layered effect.
Continue doing this around your baubles and experiment with different placements and combinations to create a unique pattern.
5. Apply a layer of glue once the surface is covered
Once all the pieces are in place, apply another layer of glue over the entire surface of the bauble. This will seal the paper and provide a protective coat.
6. Let it dry
Allow the bauble to dry entirely before drawing or adding additional embellishments.
Fabric-covered baubles
If you're wanting to add a bit of texture to your baubles, why not apply some fabric? You can create a cosy and warm look by adding fabric to your baubles.
Materials you'll need:
- The fabric of your choice, i.e. felt, silk, lace, cotton, linen
- Fabric and normal scissors
- Fabric glue
- Paintbrush or sponge
- Ribbon or string for hanging
How to make fabric-covered baubles?
1. Gather your bauble and desired fabrics
Start by choosing the fabric you want to use for your baubles. Consider the colours, patterns and textures that will complement your Christmas theme.
2. Cut the fabric into small pieces
You should cut your fabric large enough to cover the surface of the bauble. You can cut them into squares, rectangles, or any other shape you prefer. Vary the sizes and shapes to add visual interest.
3. Apply a thin layer of fabric glue to a small section of the bauble
Using a paintbrush, apply your fabric piece. You can overlap the fabric slightly to create a layered and textured effect. When placing your fabric, make sure that the fabric is smooth and free of wrinkles and air bubbles. Continue this process to suit your design goals until you've covered your bauble.
Fabric suggestions:
Fabric can really help enhance a particular theme. Lace, for instance, can work well with vintage or rustic themes. You could also paint the lace black to match a more gothic aesthetic. Cotton is also good for snowy Christmas trees or a winter wonderland theme since it can represent snow. There are so many fun ways you can use fabric to suit your intended theme!
Ribbon-wrapped baubles
Since we've been talking about fabrics, another fun fabric idea you could try is using ribbons. Choose different ribbons in various widths, colours, and patterns and wrap them around your baubles.
Materials you'll need:
- Various ribbons
- Glue
- Scissors
- Optional: Paintbrush
How to make ribbon-wrapped baubles:
1. Apply glue to the top of your bauble
Begin applying a small amount of glue to the top of the bauble. If you're using craft glue, use a paintbrush to spread a thin, even layer of glue or if you're using a glue gun, apply small dots of glue directly onto the bauble.
2. Take one end of a ribbon and press it onto the glued area
Hold it in place for a few seconds to ensure it adheres properly. Start wrapping the ribbon around the bauble, securing it with glue as you go. You can create a layered effect by wrapping different ribbons on top of each other or create a crisscross pattern by wrapping the ribbon diagonally across the bauble.
3. Continue wrapping the ribbons around the bauble
Make sure to overlap the edges slightly for a neat finish. Once you reach the desired coverage or design, cut the ribbon and secure the end with a small amount of glue. You could also tuck the excess ribbon under a previous layer.
Ribbon-wrapped baubles offer a customisable and stylish way to embellish your Christmas tree. You can coordinate the ribbon colours with your existing decor, create a specific colour theme, or even mix and match ribbons for a more eclectic look.
Filled baubles
You can also fill your own baubles with various items and objects to add some visual interest to your decor. You can add a little snowman or fill your bauble with lots of sequins. There are so many ways you can get creative!
Materials you'll need:
- Clear baubles
- Fillings of your choice, i.e. mini ornaments, tinsel, confetti, pom-poms, beads, small figurines, faux snow, dried flowers, feathers, and mini Christmas lights.
- Ribbon or string for hanging
- Optional: Glue, tweezers, funnel
How to fill your baubles
1. Gather your filling
Before adding anything inside your bauble, you'll first need to decide what to put in it. A good way to do this is by considering the colours, textures, and themes that you want to be incorporated into your decor and picking fillings that match this.
2. Remove the top of your bauble
Once you've found your fillings, carefully remove the tops of the clear baubles and begin filling them with your chosen materials. You can use a funnel to help guide small items into the baubles. Fill them partially or completely, depending on the effect you want to achieve.
3. Add glue inside the bauble (optional)
To secure the fillings in place, you can also apply a small amount of glue to the inside of the bauble so your objects can stick. This will also prevent the contents from shifting or spilling.
4. Reattach the top of the bauble
Once the baubles are filled to your satisfaction, reattach the tops and hang them on the Christmas tree.
Have fun decorating with Christmas Tree World
Hopefully, you can use some of these ideas to create amazing baubles for your Christmas decorations. Whether you're decorating a tree, a Christmas wreath or a Christmas garland, at Christmas Tree World, we offer a wide range of products to make your Christmas spectacular. Our range of Christmas baubles are made with great care and come in various colours, shapes and sizes to suit your needs
Get creative this Christmas with our collection of decorations today, and you can receive a 10-year guarantee plus FREE UK mainland delivery when you spend over £30!
Read our delivery & returns specifications for more information.
The information below is required for social login
Sign In
Create New Account